Blogger Contact Form | Contact Form for Blogger HTML Code
We will try our best to provide you the best and easiest way in blogging. This is very useful content for blogger, it will help you to add contact form in your blogging website.
Let us now learn how to create a custom contact form, which we will create in the easiest way.
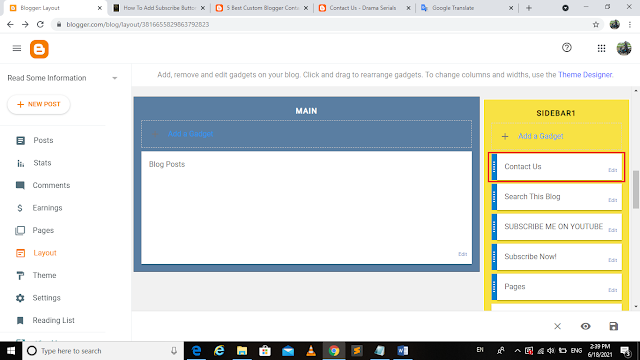
Step1: After Login into your blogger dashboard Click on
Layout and then “Add a Gadget” link on the page Sidebar.
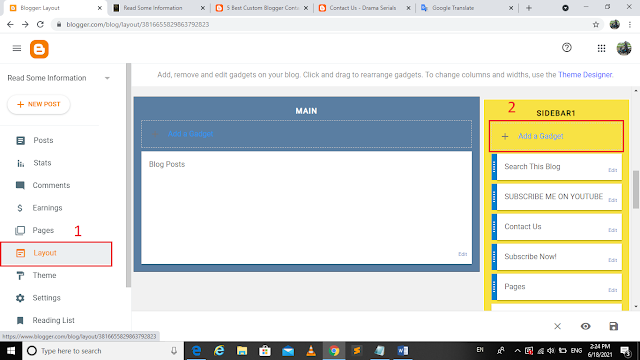
Step2: After click on the “Add a Gadget” then down the
scroll and choose the “Contact Form” Gadget.
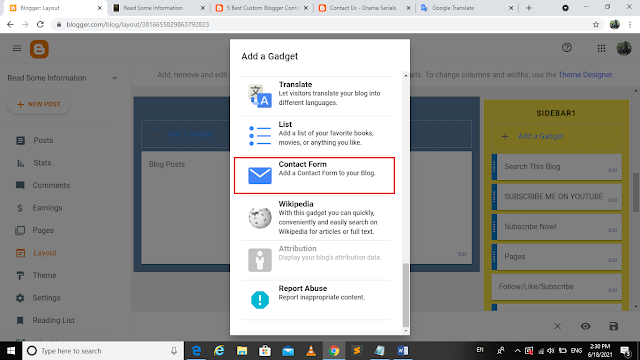
The "Configure Contact Form" slide will open.
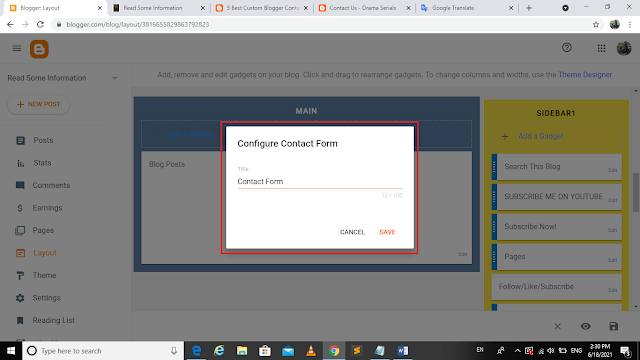
Step3: “Contact Form” Rename into “Contact Us”, and Click on
the “Save” Button.

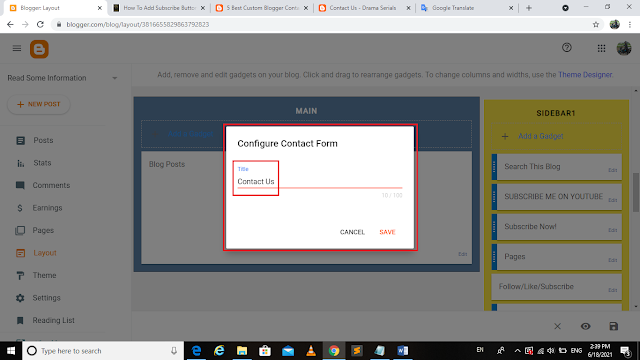
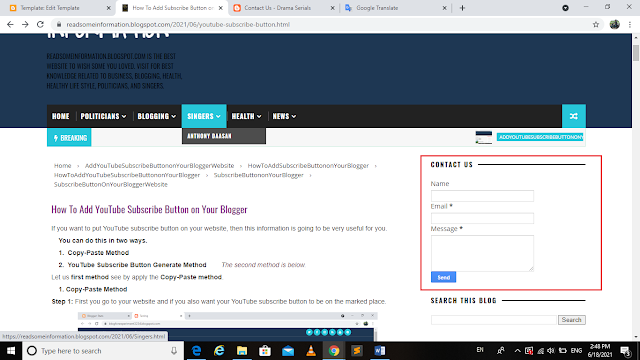
Now “Contact Us” Gadget/Form is ready for Contact.
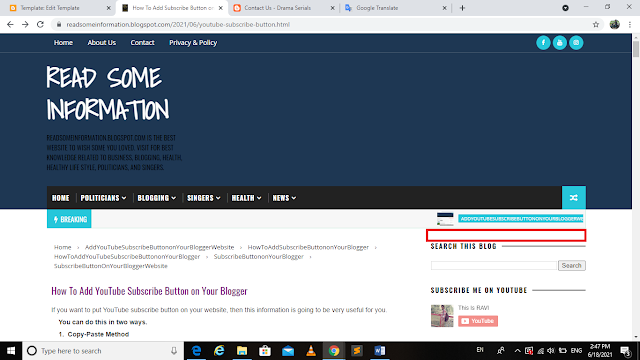
Step4: Refresh You Website you will see Contact Us Form is Ready for contact.
Hide Blogger Contact Form from sidebar
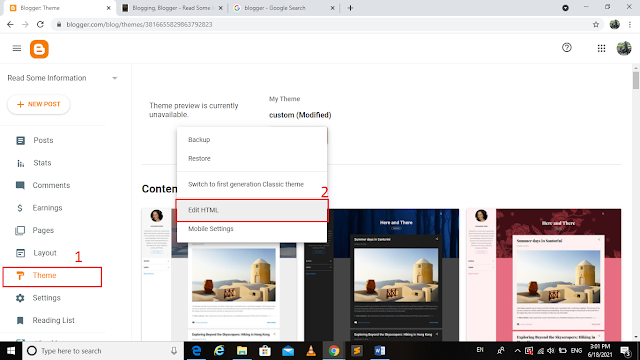
Step 1: Go to “Theme”, click on the Customize
Arrow, and click on the “Edit HTML” Button.
Step 2: Now the code editor will open, click anywhere
inside the code area and press the Ctrl + F key for open the Search Box.

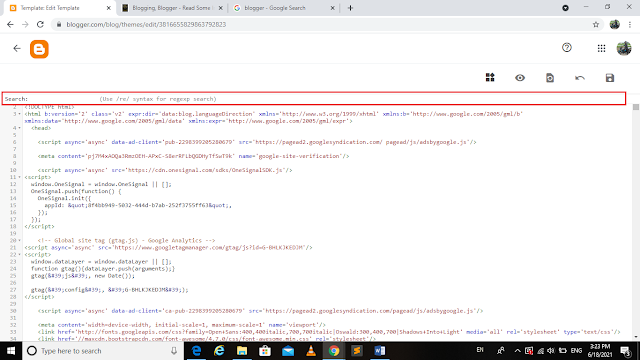
Step 3: Paste the following tag inside the Search
Box, and Press the "Enter" key for find it.
]]></b:skin>
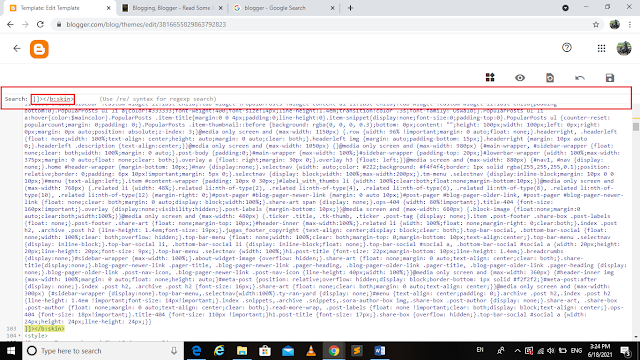
Step 4: Just above the ]]></b:skin> tag, add the given below code.
#ContactForm1{display: none !important;}
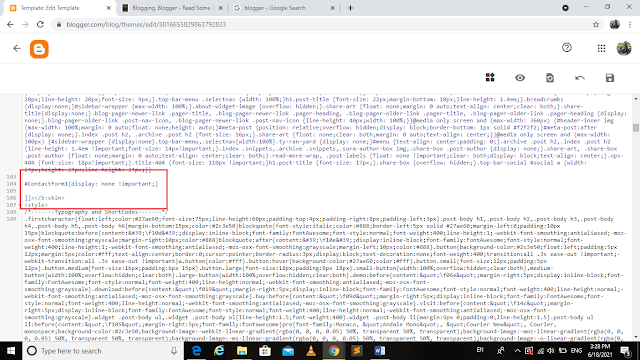
Step 5: Click the "Save Template" Button on
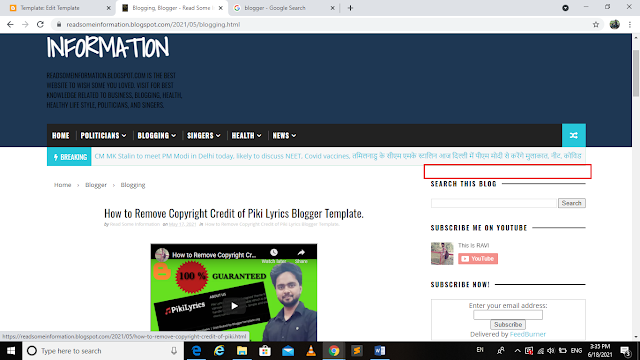
the upper right side and refresh the website, now you will see "Contact
Form" is remove.
Create a Custom Blogger Contact Form in a Static Page
Finally, now we enabled the functionality of the contact form, let’s add a custom contact form in our Blogger blog.
Step1: Go to “pages” and click on the “New page”
button.
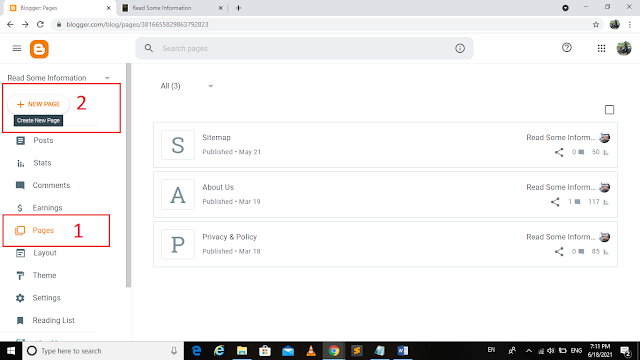
Now creation form will open.
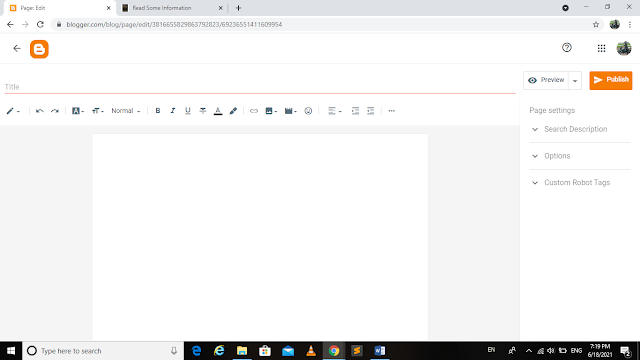
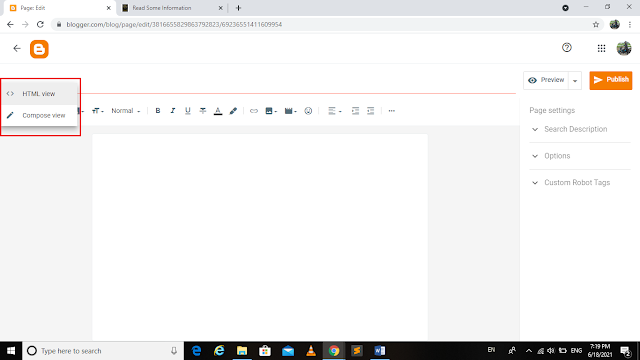
Step2: Click on HTML View and paste the code below,
and also give the title of the page.
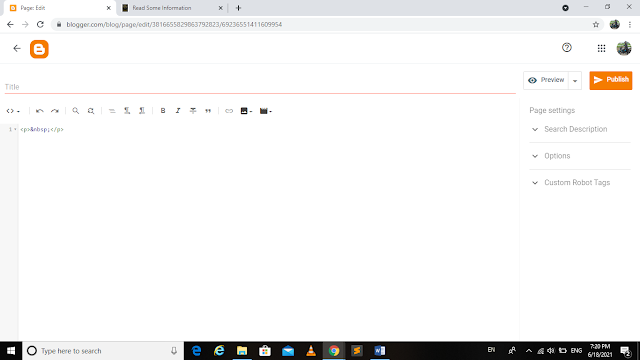
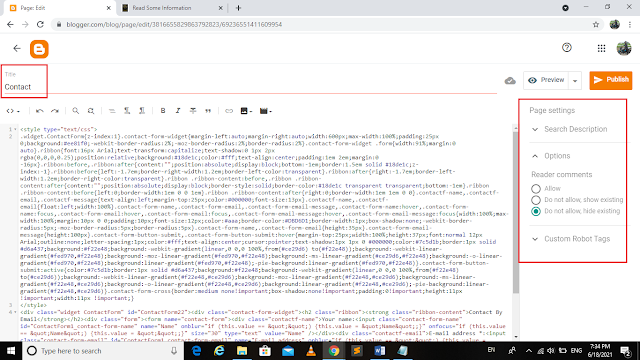
Step3: Publish the Contact page.

Click on Page View, and View the page, now Contact page will successfully have added in your website.
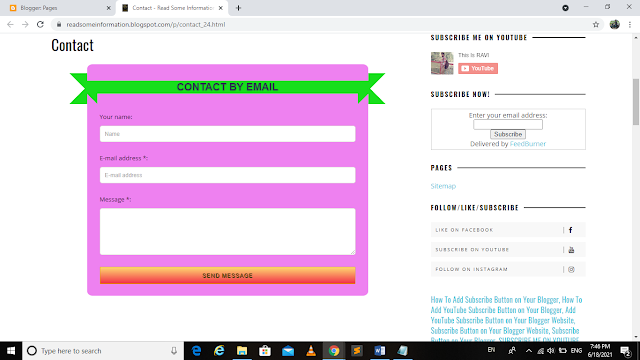
I think, this is very useful content for blogger, it must have helped you to add contact form in your blogging website.


कोई टिप्पणी नहीं:
एक टिप्पणी भेजें